Thursday, November 29, 2012

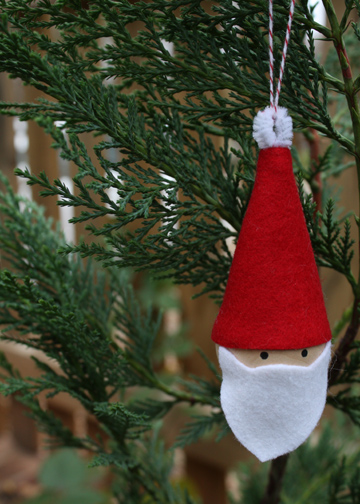
DIY: 10 Minute Santa Ornament

The Long Thread's blog is helping us keep to our overall theme of simple projects that are quick and wonderful!  Be sure to check out their blog.

santa-ornament
Ten minutes. Really. This is sort of a variation on the elf skittles that I posted about last week. But even easier. I think these would make cute additions to gifts for family, friends or teachers. The kids can help make these if you skip the glue gun and use regular school glue. You  could sign them on the back and add the year.  You could use even smaller wooden balls to make teeny tiny Santas. Or you can take it a step further and make a little body with chenille stems, a larger ball for the belly and beads for the arms and legs.
Supplies:
  • wooden ball (1 1/2″ diameter)
  • red and white felt scraps
  • black acrylic paint
  • white chenille stem (cut to 2″)
  • twine
  • glue gun
santa-ornament-instructions
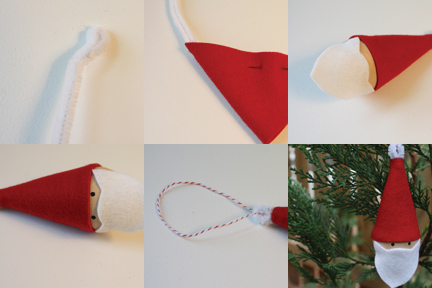
  1. Cut out the hat and beard from felt according to this template.
  2. Bend the end of your chenille stem and cut to 2″.
  3. Insert the chenille stem in the top of the hat felt and sew, right sides together, using a scant 1/4″ seam allowance. Turn right sides out and poke out the tip with a blunt tool.
  4. Place a couple of drops of glue on the inside rim of the hat and fit onto the wooden ball. Glue the beard on as well, just meeting the hat at the corners.
  5. Draw eyes with a pencil and then paint them on with black acrylic paint.
  6. Loop twine through the chenille stem and tie in a knot. Trim off the ends and put a tiny drop of glue to hold the knot in place just at the chenille stem. All done!
Wednesday, November 28, 2012

DIY: Pine Cone Garland

Twig & Thistle's blog has a great DIY that has a simple but elegant look.  I love the way that it has a natural look but really brings the holidays into the home.
Pine_Cone_Garland_1
Pine_Cone_Garland_2
Pine_Cone_Garland_3
Also, I spotted this door decoration that uses the same materials that would make a lovely companion to the garland. Instead of stringing the pine cones to the ribbon simply tie a ribbon to each hook then tie all the ribbons at the top and hang!
Pine_Cone_Garland_5
Pine_Cone_Garland_4
What You’ll Need:
Pine Cones
Ribbon
Screw Hooks
Hole Punch
Scissors
Instructions:
1. Begin by measuring your mantel or space that you’d like to hang your garland and cut your ribbon. Remember to leave extra for hanging. Once you’ve determined the length, space your pine cones out as you like on a flat surface. The pine cones I used were fairly large so I kept about 4 inches between each one. On the back of the ribbon discreetly mark where each pine cone will go, then punch a hole with a small craft punch. I used an 1/8″ round circle punch like this one.
2. Once you know how many pine cones you’ll need, screw in one screw hook into the top of each pine cone. This takes a little practice and you may need a little elbow grease but once you get the hang of it it goes pretty quickly.
3. Poke each hook through the hole you’ve made in the ribbon and hang! Easy as pie and something that will last for seasons to come!

Monday, November 26, 2012

DIY: Little Apple Yarn Favors

Need a quick and easy project for the little ones during Thanksgiving down times?  This project from Make and Take's blog is just for you!  (We are totally making these for us and we don't have kids, so that's fine, too!)

Fall Yarn Apple Kids Craft
Supplies for Yarn Apples:
  • craft yarn – red, green, or yellow (the cheap yarn will do, $2 a skein)
  • pipe cleaners (or chenille stems) – brown and green
  • piece of cardboard – 2 in x 5 in
Supplies Apple Yarn Craft
First find a piece of cardboard to help you with the winding. I tore off a piece from a box we had lying around. If you want a smaller apple, use a piece of cardboard that is 2 inches thick. Or if you want it a little larger, go 3 inches. I also bend my piece of cardboard in half a bit, just so it’s easier to take the yarn off when it’s done being wrapped.
Winding Yarn Apple Pom Pom Craft
Take your yarn color of choice and start wrapping it around your cardboard. We did ours almost 100 times around, so keep on winding!! Although I did wrap one apple only 80 times, and it looked just as good. The more you wrap, the thicker and tighter the apple looks. When you’re done winding, then just cut your string off, letting it hang in place. It will get tucked away later.
How To Apple Yarn Craft
Cut your brown piece of pipe cleaner in half and slip one through your winded up yarn. This is where the bent in half card board piece comes in handy. If your cardboard is bent, it’s easier to slip the pipe cleaner through. Then twist up the end together, forming a stem for the top of the apple.
You now put the other cut half brown pipe cleaner through again and twist it up on the opposite end of the yarn, creating the round apple and looking like the little bottom end of an apple. Twist it up a ways, then cut off the pipe cleaner with scissors fairly close to the yarn and bend that end of wire in.
Apple Craft for Kids
You can be done here or add a little leaf to the apple. With a 2 inch piece of green pipe cleaner, slip it under the top brown stem. Then bend in each half to look like 2 little leaves.
Apple Yarn Craft

Sunday, November 25, 2012

DIY: Apple Placemats

With Thanksgiving just around the corner - we think it'd be super easy to adjust this DIY from Bloesem Kids' blog for fun Pumpkin Placemats!  

4_apple1
Apple Placemats by Courtney Russel from Two Straight Lines

As we celebrate the harvest season here in the US, it's nice to get the kids involved in decorating the holiday table.  These cute apple placemats are painted using a freezer paper stencil, a technique easy enough for kids.  Freezer paper can be found at many grocery stores or online, but be careful, once you start you'll be stenciling every thing in sight.

You will need:
*Burlap
*Scissors
*Printed fabric
*Fabric glue (I like Alene's Tacky Glue)
*Red and Brown Textile Paint (I use Jacquard Paint)
*Paintbrushes- 1 wide, 1 narrow
*Freezer Paper
*Iron
*Heavy Weight Paper
*Marker
4_applecollage
Step one:
Cut your burlap to 13" x 17".
Step two:
On the heavy paper, sketch your apple, refining your drawing until you're happy.  Cut the apple out and trace around it on the paper side of the freezer paper.  Cut the apple out of your freezer paper, making sure that the area surrounding the apple is uncut-- this is your stencil.
Step three:
Place your stencil on the burlap where you would like it and iron it in place.
Step four:
Using the wide paintbrush, paint the area inside of your stencil with the red textile paint (tip: I used both foam and bristle paintbrushes and preferred the bristle).  Carefully peel your stencil away. Using the narrow paintbrush and the brown paint, paint the stem on your apple.
Step five:
Cut a leaf from your printed fabric.  Glue it next to your stem just above your apple.  If desired, use the marker to draw pretend "stitches" on the leaf.
Step six:
One at a time, pull four or five threads from each edge of the placemat to create a fringe.
Step seven:
Repeat until you have a placemat for every seat at your table.


Saturday, November 24, 2012

DIY: Crochet Acron Cap Necklace

A Foothill Home Companion has inspired us to get back into crocheting.  We are excited to do this one and can't wait to pull out some yarn and search the yard for acorns missing their caps!

a tisket a tasket, an acorn in a basket

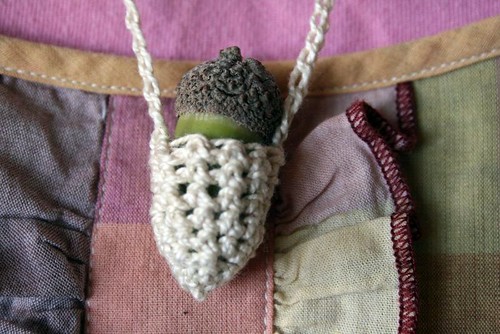
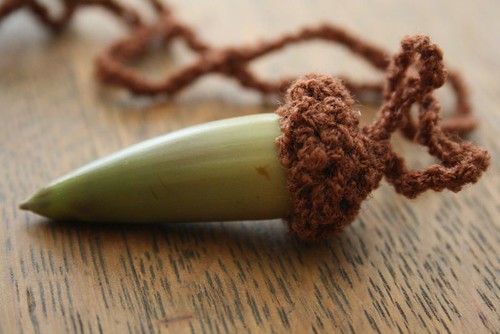
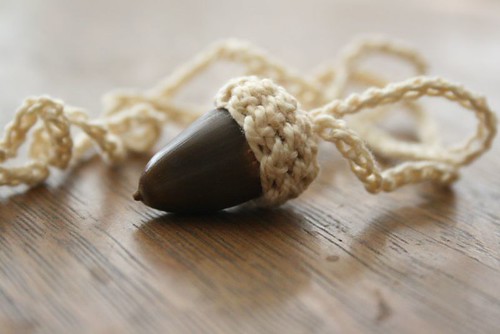
We set about gathering acorns to make more necklaces, but found that most of our acorns are loosing their caps on the way down, or on the way home in Aidan's pockets. So I reverse engineered Resurrection Fern's pattern for acorn baskets to make acorn caps.

green acorn, brown cap
brown acorn, cream cap

Materials Needed:

fine gauge crochet yarn
small crochet hook
hot glue gun
acorn

Step One:

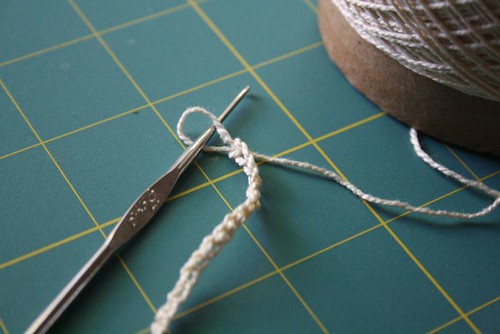
chain desired length of necklace

Chain desired length of necklace. Mine was close to 24 inches. Keep in mind that it will go over your head.

Step Two:

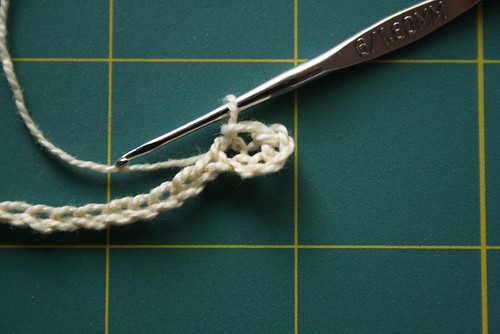
chain five, slip stitch to form circle

Chain five more, slip stitch to fifth chain from needle to form circle.

Step Three:

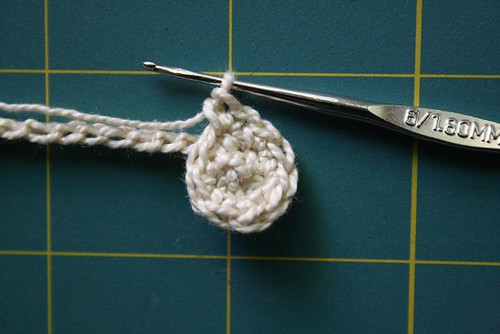
second round

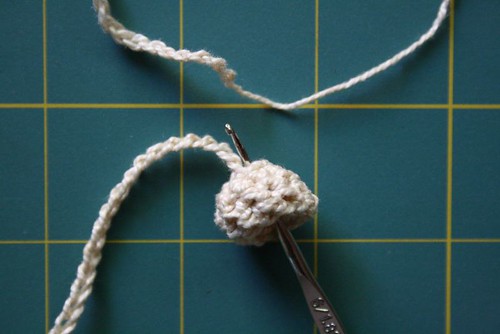
One single crochet stitch in each of the five chain stitches to make first round.
For the second round, crochet two single crochet stitches in each of the five stitches to make ten stitches.

Step Four:

work 2-3 rounds until cap forms

Single crochet one stitch in each of the ten stitches; work two to three rounds until cap forms and reaches desired size. Slip stitch to finish cap and weave in yarn.

Step Five:

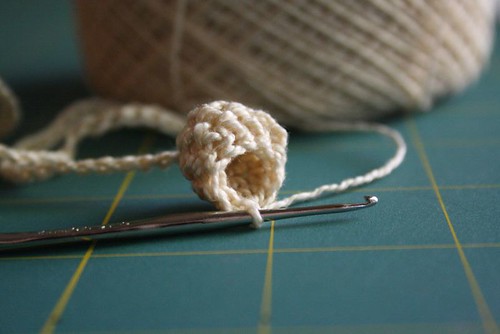
pull end of chain through cap

From inside cap, pull the end of the chain through the middle of the cap with the hook, slip stitch inside cap to anchor and weave in end of yarn.

Step Six:

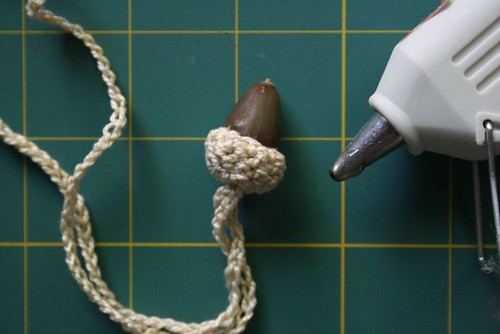
hot glue acorn to cap

Use a hot glue gun to attach cap to acorn.

Friday, November 23, 2012

DIY: Burlap Bubble Wreath Tutorial

Today's Fabulous Finds - Tomorrow's Treasure's blog is really amazing at taking step by step pictures and explaining everything she does no matter how seemingly small.  This makes it incredibly easy to duplicate her stunning results!!

Supplies Needed

1-10" foam wreath
(check your dollar store)

1 1/4 -1 1/2 yds. burlap, or other fabric

@100 pins with large heads
(You can use small headed pins for fabrics with a tighter weave. 
I used my old sewing pins and then bought a new package to replace them, now I have new pins for sewing.)

How to Make A Burlap Bubble Wreath


I used a white pin in the pictures to show where you will hold the fabric with your thumb and index finger when folding it.  You don't need to pin it until step five.

1. Cut your fabric into 4" x 4" squares (or close to that).   I cut one square first to make sure it was the size that I wanted and then used it as a guide to cut the rest of the squares.  

Cut the fabric into 4" strips and then cut each strip into 4" squares.  The squares don't need to be measured and cut precisely if you don't want to take the time, but should all be cut pretty close to the same size. 

2.  Fold the square in half to form a triangle.  Take the right hand corner (pinch one layer of the fabric on the very tip) and bring it to the front.  Line up the corners.

3.  Take the left hand corner (pinch one layer of fabric on the very tip) and take it to the back.  Line up the corners.

4.  All four corners should be lined up at the bottom.  It should look like a bubble now.

5.  Pin through all four layers of fabric.

6.  Pin the 'bubbles' to the wreath.  Pin one bubble on and then place the next one close to it so that it hides the pin on the one that you just added.  The bubbles should be just close enough so you don't see any of the foam wreath or the pins.


This pic of the back will give you a better idea of how it all goes together.  You'll want to bring the bubbles around the edge just far enough so when the wreath is against the glass/wall the green doesn't show from the side.  (You can cover the back with fabric first if you'd like.)

To give you an idea of how many it will take, I used just over 90 burlap squares for this wreath.


Thursday, November 22, 2012

DIY: Pumpkin Pie Potpourri

la99191_1002_potpouri.jpgThanks to Martha Stewart - who knows the most amazing ways to jazz up any home decor - we are featuring this wonderfully simple DIY on pumpkin pie potpourri.  It's so easy it's almost ridiculous - almost!

Plus now is the perfect time to cut into those pumpkins and they won't spoil!


Use a pumpkin incense burner to suggest the cozy scent of pie just out of the oven. Cut off the pumpkin's top and scrape out the innards; carve round vents with an apple corer. Rub cinnamon or pumpkin-pie spices onto the lid, or push cloves into it. With a lighted tealight candle inside, the pumpkin will give off a lovely fragrance for about six hours.

Wednesday, November 21, 2012

DIY: Yarn Balls

Abernathy Crafts made such an easy yarn wrapped ball tutorial, we know this is just perfect for those left over pieces of yarn from crochet projects!  So easy, but soooo pretty.  We LOVE it.  

Check them out for more!
yarn balls 5
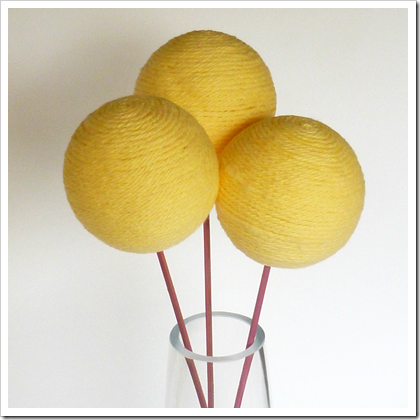
I didn’t know what else to call them.  They’re balls, wrapped in yarn.  Yarn balls.  I know, it’s silly.  But if you’d like to know how to make some to add some pretty silliness to your space, I’ve got a tutorial for you.
yarn balls
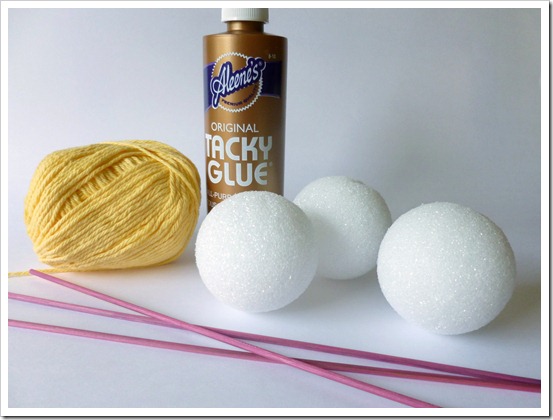
Materials needed:

  • Styrofoam balls (any size will do)
  • Wooden skewers
  • Craft glue
  • Yarn
Before I started on this project, I read on Pinterest that you can dye your skewers using food coloring.  So I tried it.  I filled a glass baking dish with water and several drops of food coloring.  Then I soaked the skewers overnight.  The next day I discovered that it didn’t work.  So then I added the entire bottle of food coloring.  That did the trick.  So apparently it does work but you just have to use a ridiculous amount of food coloring for the wood to soak up. 

yarn balls 2

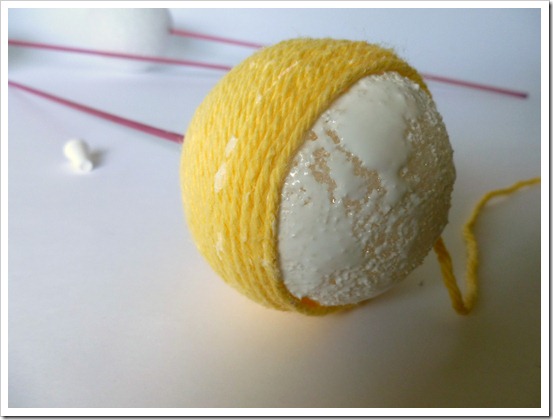
So, start by shoving the skewers lovingly into the Styrofoam balls.  Pointed end in works best.
yarn balls 3

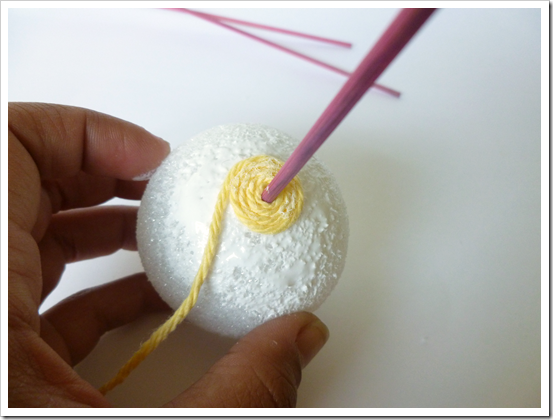
Starting at the bottom around the stick, spread some glue and begin wrapping the yarn around in a spiral.
banner 2

Keep gluing and wrapping the yarn around until you get to the top.
yarn balls 6

Tuesday, November 20, 2012

DIY: Wax Paper and Crayon Fall Leaves

V and Co.'s Crayon Wax Leaves are wonderful.  They make the perfect window accessory and we can even see a wreath being made with these wonders!

these leaves were made just like you used to make those stain glass windows with wax paper and crayon shavings.

you can hang them, you can place them prettily to dress up any surface, and well you can just place them on your windows as well.
WHAT YOU WILL NEED:

*wax paper.
*scissors
*iron
*towels (so that you don't ruin your ironing board)
*paper towels (so you don't ruin your iron)


*fall colored crayons that have seen better days

*leaf template (right click hit save as and then print off. make sure you make them fit your picture screen so it doesn't cut off any of the leaf. i made mine as a 4 by 7 picture)


cut out wax paper approx letter paper size. with scissors start shaving your crayon onto the wax paper. not too much we want it to be a pretty thin layer of crayon melt.
i mixed two colors:
*brown and orange
*yellow and magenta
*orange and yellow
my favorite ones turned out to be the yellow and magenta ones.

when you have your two colors shaved on, place the second piece of wax paper on top making a sandwich.

with an iron set on a warm setting, place a towel first down onto your ironing board. then your wax paper and crayon sandwich. then place a paper towel in between your iron and the wax paper sandwich.

slowly melt your crayon shavings. and push the "liquid crayon" around so it's thin and covers a larger area. (be careful of spilling the wax! don't push it too far out or it will seep out the corners of your wax paper sandwich!)
once they are cool take your print out leaf, and your wax paper creation.
place underneath, it should be clear enough for you to be able to see your lines.
with a pencil trace your leaves.

cut out your leaves.


admire your pretty leaves, that surprisingly are making you feel a little better about fall coming.
now if you would like to hang them, i just got a needle and thread and made a big knot at the end of my thread. i hung them in front of our window, i hung them above our dinging room table, but in the end they ended up taped up...

enjoy!